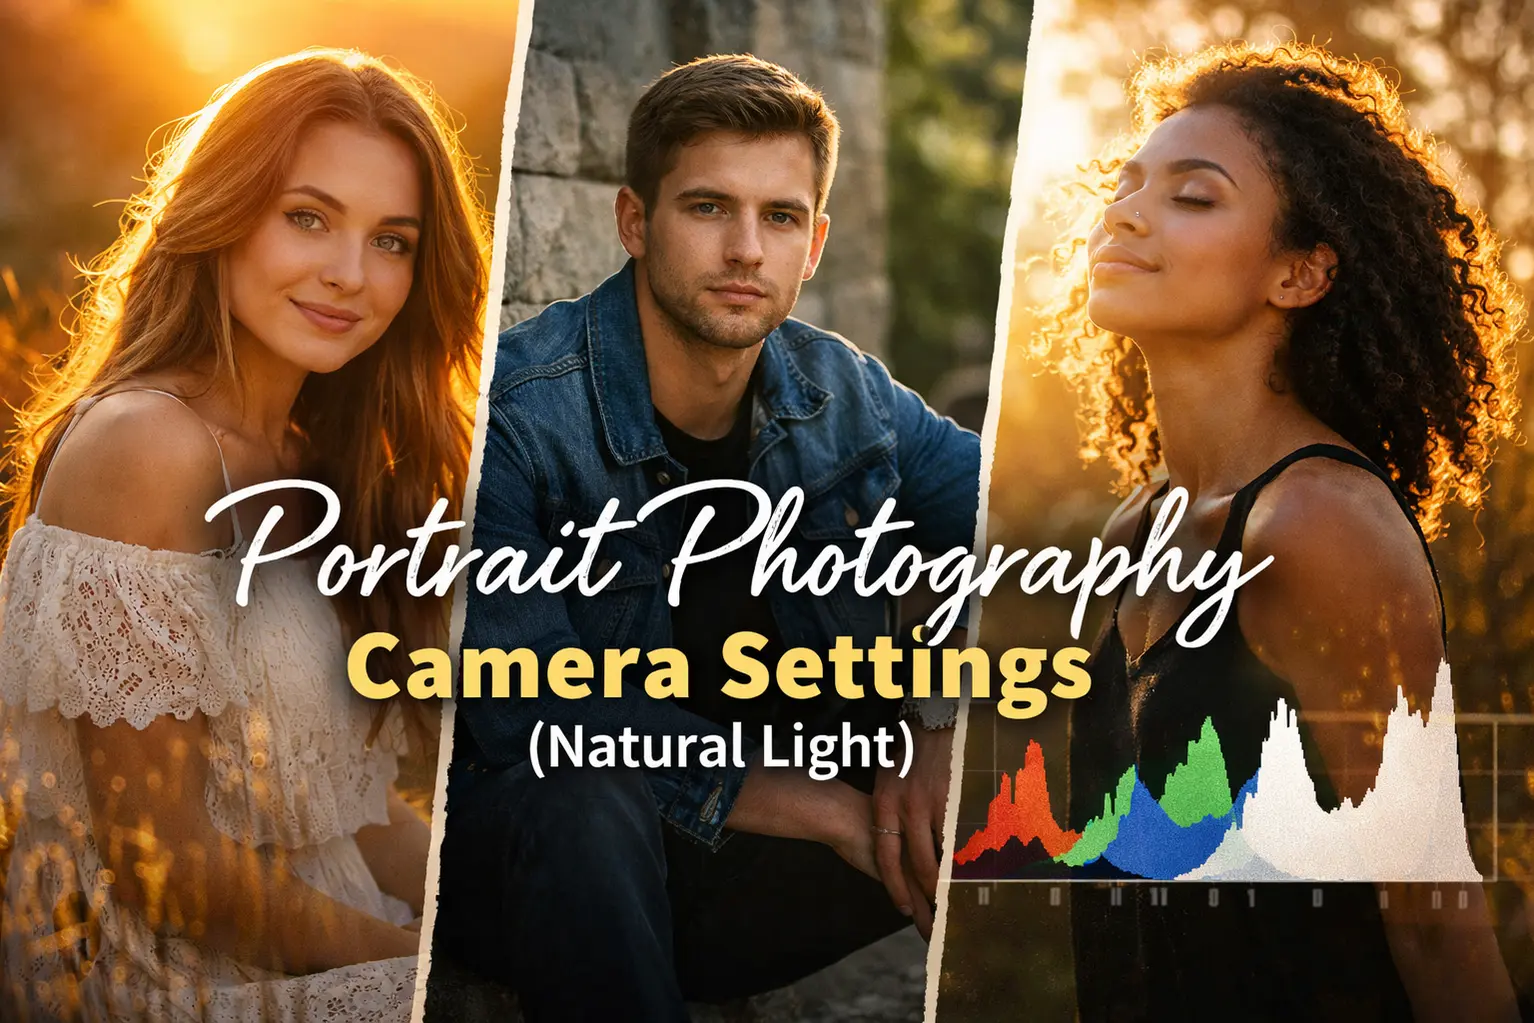
Natural light portrait photography is both rewarding and challenging. Unlike studio setups, you cannot control the sun, clouds, or reflections. Instead, you must learn to read the scene, interpret the light, and adjust your camera settings accordingly.
Daisy’s Genre Spotlight focuses on how photographers think in the field: analyzing light direction, balancing exposure, and making quick decisions that shape the mood of a portrait. This is not about memorizing rules—it’s about learning to see and react to light in real time.
By the end of this guide, you’ll know how to set your camera for natural light portraits, when to trust auto settings, and when to override them for creative control. The goal is confidence: being able to walk into any lighting situation and know exactly how to adapt.
Quick Answer: For natural light portraits, use aperture priority around f/2.8–f/4, ISO 100–400 depending on light, and adjust shutter speed to avoid blur. Always read the light direction and use exposure compensation when needed.
Daisy says: “Let’s be honest, natural light portraits are unpredictable. If I were shooting in late afternoon, I’d open aperture wide, keep ISO low, and watch how shadows fall across the face.”
Scene Analysis: Reading Natural Light
Before adjusting your camera, you must first analyze the scene. Natural light portraits depend on the quality, direction, and intensity of light. A portrait taken in harsh midday sun will produce strong shadows and high contrast, while one taken during golden hour will create soft, flattering tones.
Daisy emphasizes that the first step is always to look at where the light is coming from. Is it side light, back light, or front light? Each creates a different mood. Side light adds depth and texture, back light creates a halo effect, and front light flattens features but reduces shadows.
By reading the scene, you anticipate how the camera will interpret exposure. This analysis guides your settings more than any technical chart. It’s about seeing the light as part of the story, not just a technical factor.
Daisy’s Tip: “Most beginners make this mistake: they jump straight to settings without looking at the light. The scene tells you what the settings should be.”
Camera Settings Breakdown
Once you’ve read the light, it’s time to set your camera. For natural light portraits, aperture priority mode is often the best choice. Set aperture between f/2.8 and f/4 to achieve shallow depth of field, keeping the subject sharp while blurring the background.
ISO should stay as low as possible—100 in bright light, 400 in shade—to minimize noise. Shutter speed must be fast enough to avoid motion blur, ideally above 1/125s for handheld portraits. These settings are not fixed rules but starting points that adapt to the scene you analyzed earlier.
Daisy recommends enabling exposure compensation to quickly adjust for backlit scenes. For example, if the subject is against a bright sky, dial in +1 EV to prevent underexposure. This small adjustment can make the difference between a flat image and one with natural skin tones.
Daisy’s Tip: “Here’s what I’d actually do: if I see the subject’s face dark against a bright background, I’d add +1 EV immediately. That way, the portrait feels alive instead of dull.”
Cameras like the Sony A7 IV offer excellent dynamic range for natural light portraits. You’ll find listings on Amazon and bundles on B&H.
Lighting Interpretation: Golden Hour vs Midday
Golden hour light is soft, directional, and warm. It flatters skin tones and creates natural catchlights in the eyes. Settings here can lean toward wider apertures and lower ISO, as the light is gentle and forgiving.
Midday light, however, is harsh and overhead. It produces deep shadows under the eyes and nose. Skin tones often look washed out if you don’t compensate. Daisy suggests moving the subject into shade or using a reflector to soften midday light.
The histogram will often show strong peaks in highlights during midday, while golden hour produces smoother distributions. By interpreting the light, you decide not only technical settings but also creative direction.
Daisy’s Tip: “Here’s what I’d actually do: in golden hour, I’d shoot wide open at f/2.8. At midday, I’d move the subject into shade and adjust ISO to keep skin tones natural.”
Genre Decision Table
| Lighting Condition | Recommended Settings | Creative Effect |
|---|---|---|
| Golden Hour | f/2.8, ISO 100, 1/250s | Warm tones, flattering skin |
| Midday Sun | f/4, ISO 200–400, 1/500s | High contrast, harsh shadows |
| Shade | f/2.8, ISO 400, 1/125s | Soft tones, even exposure |
| Backlight | f/2.8, ISO 200, +1 EV | Halo effect, dramatic mood |
This table helps you make quick decisions in the field. By matching lighting conditions with recommended settings, you avoid guesswork. Golden hour favors warmth and softness, while midday sun demands control and compensation. Shade offers balance, and backlight creates drama. Daisy emphasizes that the table is a guide, not a rulebook—your creative intent always matters.
Reflectors like the Neewer 5-in-1 kit are excellent for natural light portraits. You’ll find listings on Amazon and bundles on B&H.
Advanced Technique: Using Reflectors
A reflector is one of the simplest yet most powerful tools in natural light portrait photography. By bouncing light back onto the subject, you can fill shadows and create balanced exposure. Silver reflectors add contrast, white reflectors soften light, and gold reflectors warm skin tones.
Daisy’s workflow: position the reflector opposite the light source, angled to direct light onto the subject’s face. In midday sun, this reduces harsh shadows. In golden hour, it enhances warmth and glow. Reflectors are lightweight, affordable, and easy to carry, making them essential for outdoor portrait sessions.
Practice is key. Try shooting the same portrait with and without a reflector. Compare the histograms: with reflector, midtones rise, shadows soften, and highlights remain controlled. This shows how reflectors not only change the look but also improve technical exposure.
Daisy’s Tip: “Most beginners make this mistake: they hold the reflector too close, creating unnatural glare. Keep it subtle—light should feel natural, not forced.”
Real-World Shooting Breakdown: Two Examples
Example 1 – Street Portrait at Dusk: Imagine photographing a subject just after sunset. The ambient light is dim, street lamps create pools of brightness, and the subject’s face is partially lit. The LCD preview might look fine, but the histogram reveals a heavy left bias—shadows dominate. Daisy’s approach: raise ISO moderately (400–800), open aperture wide (f/1.8–f/2.8), and adjust shutter speed to balance. This shifts the histogram toward midtones, keeping highlights intact.
Example 2 – Park Portrait in Golden Hour: In late afternoon, warm light falls across the subject’s face. Here Daisy sets aperture at f/2.8, ISO 100, and shutter speed around 1/250s. The histogram shows smooth distribution, with highlights controlled and midtones rich. Skin tones look natural, and catchlights appear in the eyes. Without checking the histogram, you might underexpose; with it, you achieve portraits that retain atmosphere and detail.
Daisy’s Tip: “Most beginners make this mistake: they trust auto mode in dusk portraits. The histogram shows you when auto underexposes—so take control.”
Workflow: Integrating Histograms into Shooting
Histograms are most powerful when they become part of your shooting workflow. Daisy recommends a three-step habit:
- Step 1: Enable histogram display in live view.
- Step 2: After each shot, glance at the histogram to check tonal distribution.
- Step 3: Adjust exposure compensation or manual settings based on what you see.
This habit ensures you don’t rely solely on the LCD preview, which can mislead in bright sunlight. Over time, you’ll learn to anticipate histogram shapes before you even take the shot. Shade portraits lean left, beach scenes lean right, and balanced light produces smoother curves. Integrating histograms into workflow means you stop guessing and start making deliberate choices.
Cameras like the Nikon Z6 II allow quick histogram toggling in live view. You’ll find listings on Amazon and bundles on B&H.
Best For: Photographers who want real-time exposure feedback without guesswork.
Common Mistakes with Histograms
Many beginners misuse histograms. Daisy highlights the most frequent errors:
- Chasing the Perfect Shape: Believing every histogram should look like a bell curve. Reality: the shape depends entirely on the scene. Foggy mornings look flat, concerts show sharp peaks.
- Ignoring Clipping Warnings: A spike at the far left or right means lost detail. Shadows crushed to black or highlights blown to white cannot be recovered.
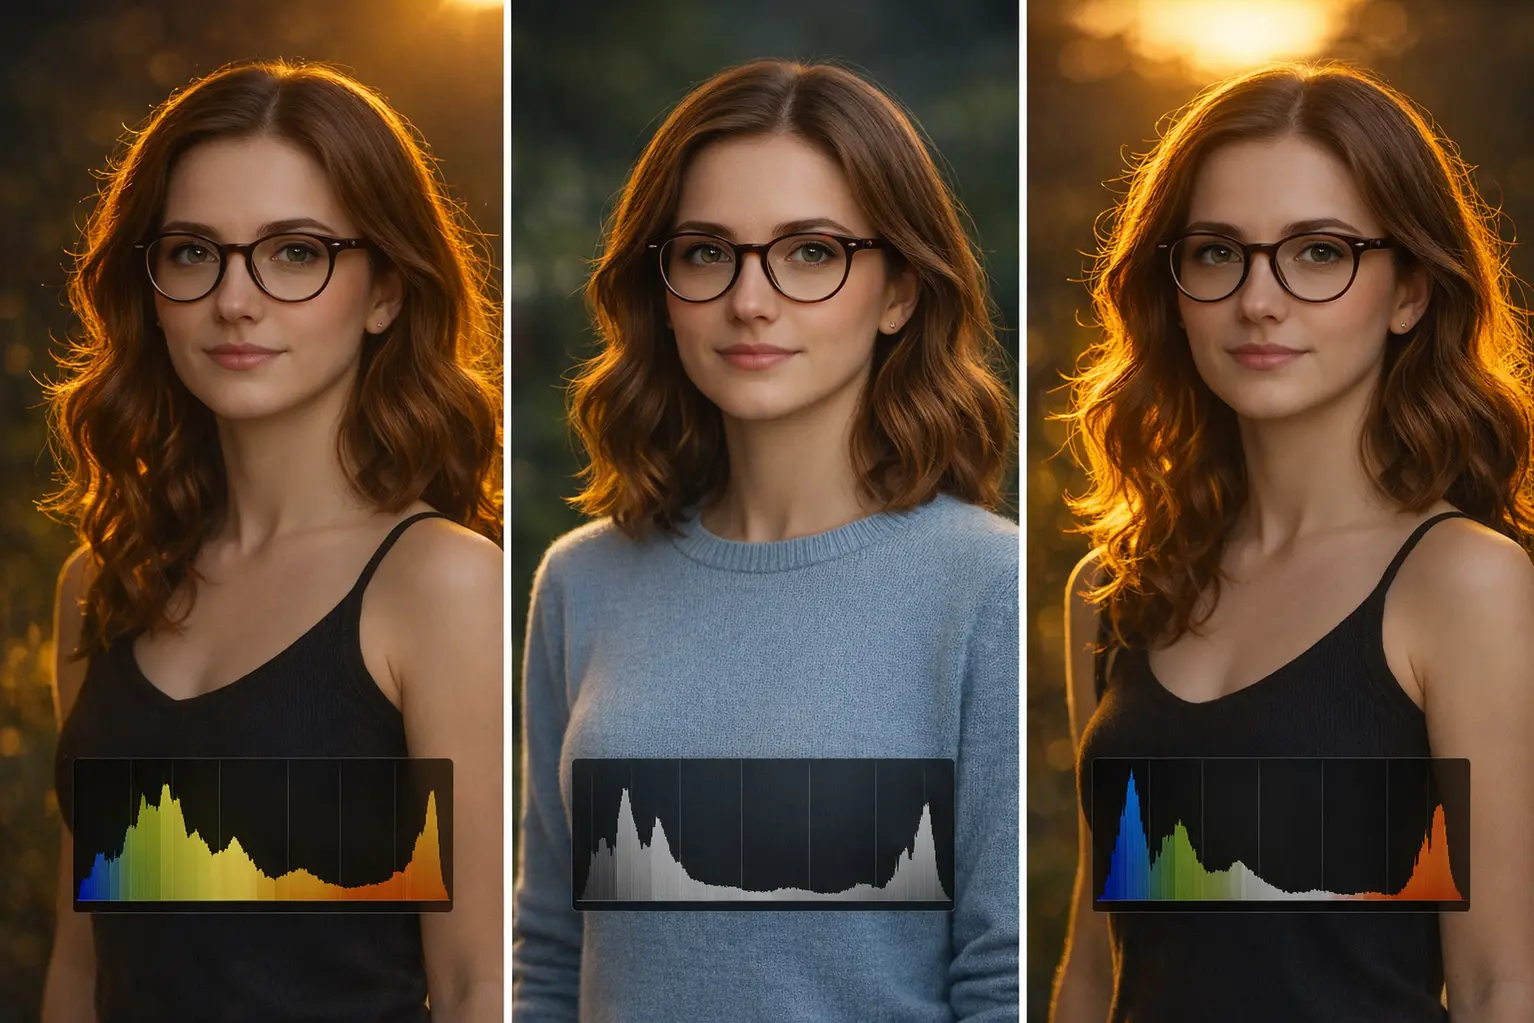
- Confusing RGB Channels: Overlooking color clipping can ruin skin tones. Always check RGB histograms for portraits. A luminance histogram may look fine, but if the red channel is clipped, skin tones look unnatural.
- Overreliance on LCD Preview: The screen can mislead in bright sunlight or dim conditions. The histogram is objective, while the preview is subjective.
Daisy recommends deliberate practice: shoot a high-contrast scene, then compare histogram shapes to see how exposure shifts affect the graph. By doing this repeatedly, you’ll learn to recognize mistakes before they happen. The histogram is not an aesthetic judgment but a diagnostic tool. Use it to inform, not dictate, your exposure decisions.
Authority Note: Histograms are diagnostic tools, not aesthetic judgments. Use them to inform, not dictate, your exposure decisions.
For deeper learning, explore our cornerstone guide on complete guide to the exposure triangle. You can also check the photography terms for foundational lessons, and read our technical article on detailed histogram tutorial. These links reinforce your portrait knowledge and connect you to broader learning paths.
Conclusion
Natural light is unpredictable—but that’s what makes it powerful. When you learn to read the light, you stop reacting and start shaping the scene. A portrait becomes more than a face; it becomes a story told through shadows and highlights.
With each session, you’ll gain confidence. You’ll know when to override auto mode, when to trust your eye, and when to let the light lead. That’s the shift—from guessing to knowing. And once you feel it, you won’t go back.
Daisy’s Advice: “Natural light is never perfect, but that’s what makes it beautiful. Learn to adapt, and your portraits will carry emotion instead of just exposure.”
Daisy’s Last Word: “Portraits in natural light are alive. Share your favorite natural light trick in the comments—I’d love to hear how you use it.”
FAQ
What aperture is best for natural light portraits?
Use f/2.8–f/4 for shallow depth of field. This keeps the subject sharp while blurring the background. Wider apertures also help in low light, but watch out for overly thin focus planes.
How do I handle harsh midday sun?
Move the subject into shade or use a reflector. Midday light creates strong shadows, so soften it. ISO 200–400 and aperture f/4 often balance exposure in these conditions.
Should I trust auto mode?
Auto mode can be useful, but it often underexposes in backlit or dusk scenes. Use exposure compensation (+1 EV) or manual adjustments to keep skin tones natural. Trust your histogram more than the LCD preview.
Can I shoot portraits without extra gear?
Yes. Natural light portraits can be done with just a camera and lens. However, simple tools like reflectors or diffusers improve results. They’re inexpensive and make a big difference in controlling light.