Photography often feels magical at first — a single click can freeze a split second or turn movement into soft, flowing motion. But behind that magic is one simple control that decides how time appears in your photo: shutter speed.
In this Daisy Teaches lesson, we’ll break down how shutter speed works in photography, why it matters, and how it helps you either freeze motion or create beautiful motion blur. No formulas, no confusing jargon — just clear, beginner-friendly explanations with real-world examples.
If you’ve already followed Daisy’s guides on aperture and ISO, you’ve met two sides of the exposure triangle. Shutter speed is the third — and it’s the one that controls movement. Whether you’re photographing a running child, a flying bird, or glowing city lights at night, shutter speed is often the first setting you need to understand.
By the end of this guide, you’ll know:
- What shutter speed really does
- When to use fast or slow shutter speeds
- How shutter speed changes the look and feel of motion
Let’s slow things down — or speed them up — and see how shutter speed shapes your photos.
What Is Shutter Speed in Photography?
Shutter Speed Explained Simply
You can think of shutter speed as a small curtain inside your camera that opens and closes when you take a photo. When this curtain opens, light reaches the camera’s sensor. When it closes, the exposure ends.
The key idea is time. Shutter speed is not about brightness alone — it’s about how long the sensor is exposed to the scene. The longer the shutter stays open, the more time the camera has to record light and movement.
For example, a shutter speed of 1/1000 second opens and closes almost instantly. This captures a very short moment in time, making moving subjects appear sharp and frozen. On the other hand, a shutter speed of 1 second keeps the shutter open much longer, allowing anything that moves during that time to blur across the frame.
How Shutter Speed Affects Motion
One of the most important roles of shutter speed is controlling how motion looks in your photos. Depending on how fast or slow your shutter is, movement can either be frozen in time or intentionally blurred for creative effect.
Fast Shutter Speed (Freezing Motion)
✔ Wildlife
✔ Action photography
✔ Kids & pets
Fast shutter speeds usually range from around 1/500 second to 1/4000 second or even faster. At these speeds, the shutter is open for such a short time that moving subjects barely have a chance to change position.
This is what photographers mean when they say “freeze the moment.” A fast shutter speed can capture a football suspended in mid-air, a bird’s wings mid-flap, or a child running without motion blur.
Slow Shutter Speed (Creating Motion Blur)
✔ Light trails
✔ Night photography
✔ Creative motion effects
Slow shutter speeds are typically 1/30 second or slower. At these speeds, the shutter stays open long enough for movement to be recorded as blur rather than sharp detail.
This is often used intentionally to show motion — silky smooth waterfalls, streaking car lights at night, or soft movement in clouds and water. Because the shutter is open longer, even small camera movements can cause blur, which is why a tripod is strongly recommended when using slow shutter speeds.
Shutter Speed & Exposure (Quick Refresher)
Shutter speed is one of the three key elements of the Exposure Triangle, working together with aperture and ISO to control how bright or dark your photo appears.
When you change shutter speed, you’re not just affecting motion — you’re also changing how much light reaches the sensor. A slower shutter lets in more light, while a faster shutter reduces it.
This is why shutter speed adjustments often require a balance. If you slow down the shutter to capture motion blur, you may need to close the aperture or lower the ISO. If you speed it up to freeze action, you might need a wider aperture or higher ISO to maintain proper exposure.
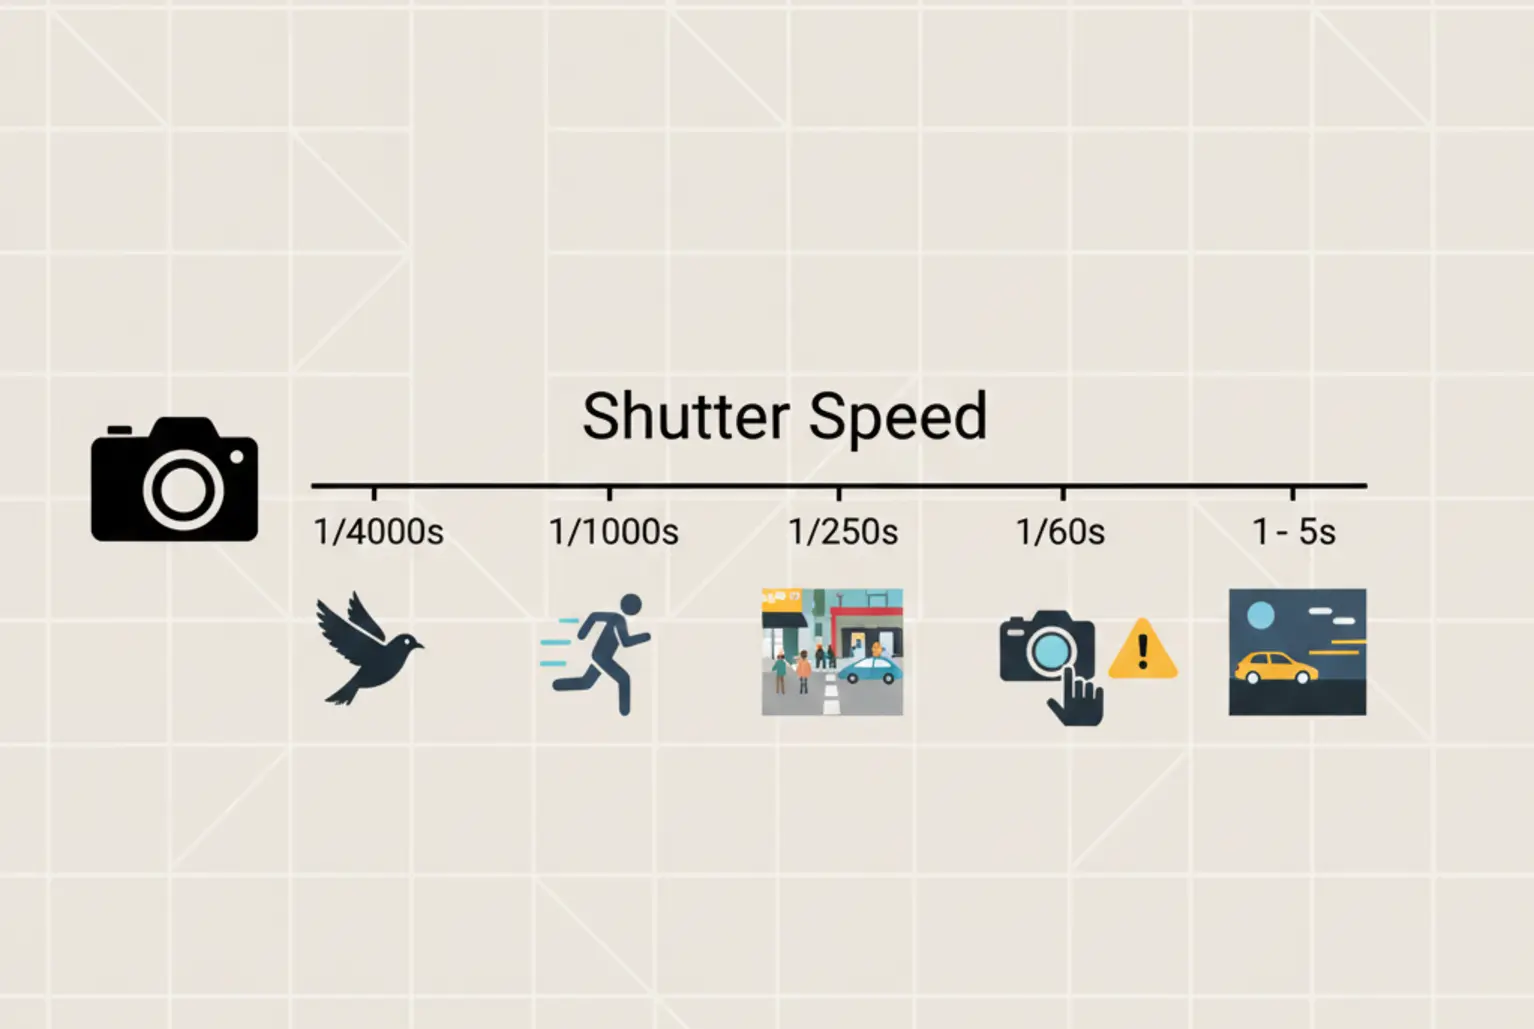
Common Shutter Speed Examples (Beginner Chart)
To make shutter speed easier to understand, here are some common settings and what they’re typically used for. Think of this as a quick reference you can return to whenever you’re unsure which shutter speed to start with.
Typical Shutter Speeds & What They Do
- 1/4000s → Flying birds and very fast action
- 1/1000s → Sports and fast-moving subjects
- 1/250s → Street photography and everyday movement
- 1/60s → Common handheld limit for sharp photos
- 1–5 seconds → Light trails and long-exposure effects
These values aren’t strict rules, but they provide a helpful starting point. As you gain experience, you’ll learn how to adjust shutter speed creatively depending on your subject and shooting conditions.
Beginner Mistakes with Shutter Speed
Shutter speed is simple to understand, but many beginners run into the same problems when using it in real-world situations. Knowing these common mistakes can save you a lot of frustration — and blurry photos.
Using a Shutter Speed That’s Too Slow
One of the most common issues is choosing a shutter speed that’s too slow for handheld shooting. When the shutter stays open longer, even tiny hand movements can cause blur, especially below 1/60 second.
This often happens indoors or in low light, where the camera automatically slows the shutter to let in more light.
Blaming the Camera Instead of the Settings
Many beginners assume their camera is the problem when photos aren’t sharp. In reality, the issue is often shutter speed — not autofocus, lens quality, or camera brand.
Understanding how shutter speed works gives you control over motion and sharpness, even with entry-level cameras.
Forgetting to Balance ISO and Aperture
Another common mistake is changing shutter speed without adjusting ISO or aperture. A faster shutter reduces light, which can lead to dark images if ISO or aperture aren’t compensated.
Shutter speed never works alone — it’s always part of the exposure triangle.
Shutter Speed vs Aperture vs ISO (Quick Comparison)
Shutter speed, aperture, and ISO all affect exposure, but each one controls a different aspect of your photo. Understanding how they compare makes it much easier to know which setting to adjust first.
What Each Setting Controls
- Shutter Speed → Controls motion and how movement appears
- Aperture → Controls depth of field and background blur
- ISO → Controls image brightness and noise
Which One Should You Adjust First?
A simple rule of thumb is to decide what matters most in your photo:
- If your subject is moving and needs to be sharp, start with shutter speed.
- If you want a blurry or sharp background, start with aperture.
- If your photo is still too dark or bright, adjust ISO last.
This balance between shutter speed, aperture, and ISO is what photographers call the Exposure Triangle. Once you understand how these three settings work together, manual mode becomes far less intimidating.
Final Thoughts — When to Change Shutter Speed First
Understanding how shutter speed works in photography gives you control over time, motion, and sharpness. Whether you want to freeze motion with a fast shutter or create artistic motion blur with a slow one, shutter speed is often the first setting you should think about.
If your subject is moving, start by choosing the right shutter speed. Once motion looks the way you want, fine-tune exposure using aperture and ISO. This simple approach helps beginners avoid blurry photos and build confidence faster.
Where to Go Next?
Shutter speed is just one part of the bigger picture. To build a strong foundation in photography, continue with these beginner-friendly guides:
- Daisy Teaches: The Exposure Triangle
- Daisy Teaches: Aperture for Beginners
- Daisy Teaches: Understanding ISO
- Basic Photography Terms Explained
Mastering these basics will make every camera — from beginner models to professional gear — easier and more enjoyable to use.
Frequently Asked Questions About Shutter Speed
What is the best shutter speed for beginners?
A good starting point for beginners is around 1/125 second for general photography. It’s fast enough to avoid camera shake while still letting in enough light in most situations.
What shutter speed freezes motion?
To freeze motion, use a fast shutter speed such as 1/500 second or faster. Sports, wildlife, and action photography often require even higher speeds.
When should I use slow shutter speed?
Slow shutter speeds are best when you want to show motion, such as light trails, waterfalls, or creative blur effects. Using a tripod is highly recommended for sharp results.