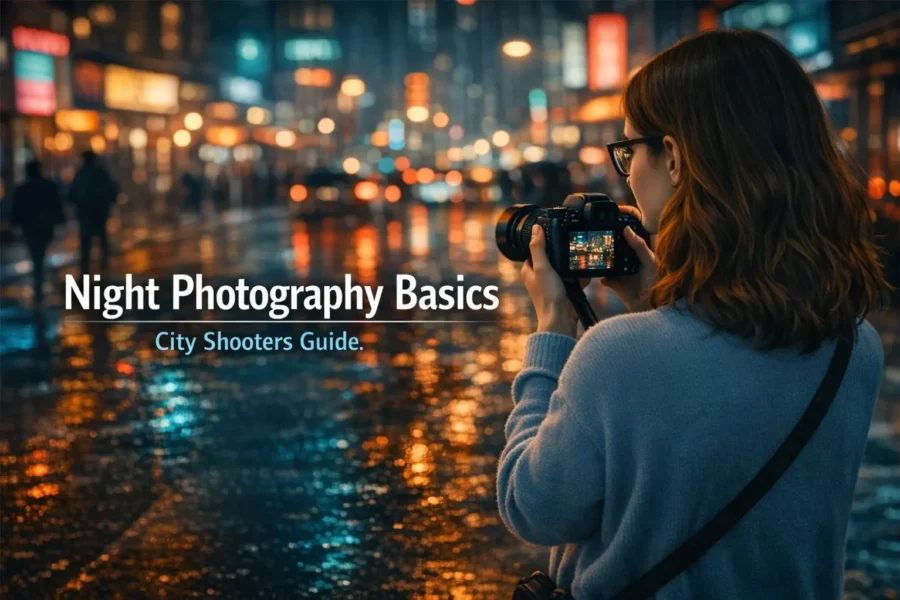
City nights don’t look the way your camera sees them.
To your eyes, everything feels alive — glowing streetlights, reflections on wet asphalt, neon signs flickering in the distance, people moving through shadows. There’s contrast, depth, atmosphere.
But when you take the shot?
It comes out noisy, blurry, flat… or just not as cinematic as you imagined.
If you’ve ever wondered why your night photos look soft, why colors feel off, or why everything falls apart after sunset — you’re not alone. Night photography is where most photographers hit a wall.
And here’s the truth:
Night photography isn’t just “low light photography.”
It’s a completely different way of seeing.
In cities, light doesn’t disappear — it becomes unpredictable. You’re no longer working with one clean light source. You’re dealing with mixed temperatures, moving subjects, extreme contrast, and constantly shifting exposure decisions.
That’s why the same settings that worked perfectly during the day suddenly fail at night.
This guide is not about memorizing settings.
It’s about understanding how night scenes actually behave — so you can make the right decisions in real time.
Because once you learn how to read the scene, everything changes.
What Makes Night Photography in Cities So Different
City night photography is not just daytime photography with less light. It’s a completely different environment where light behaves unpredictably, contrast becomes extreme, and your camera has to work much harder to interpret what it sees.
And this is where most people get it wrong.
During the day, light is consistent. You have a dominant source — the sun — and everything else falls into place around it. Exposure decisions are relatively stable, colors are predictable, and autofocus works reliably.
At night, that structure disappears.
You’re no longer dealing with one light source — you’re dealing with dozens.
Street lamps, car headlights, LED panels, neon signs, storefront lighting… all with different color temperatures, intensities, and directions.
This creates three major challenges:
1. Mixed lighting
Warm and cool tones exist in the same frame, often clashing.
2. Extreme dynamic range
Bright highlights and deep shadows exist side by side.
3. Constant motion
Cars, people, reflections — nothing stays still for long.
Your camera doesn’t “understand” this complexity.
It tries to average everything — and that’s why your images often look flat or incorrect.
This is why night photography is less about settings and more about decisions.
You’re constantly choosing:
Do I preserve highlights or shadows?
Do I freeze motion or embrace blur?
Do I correct color or keep the mood?
There is no single correct answer.
And that’s exactly what makes night photography powerful.
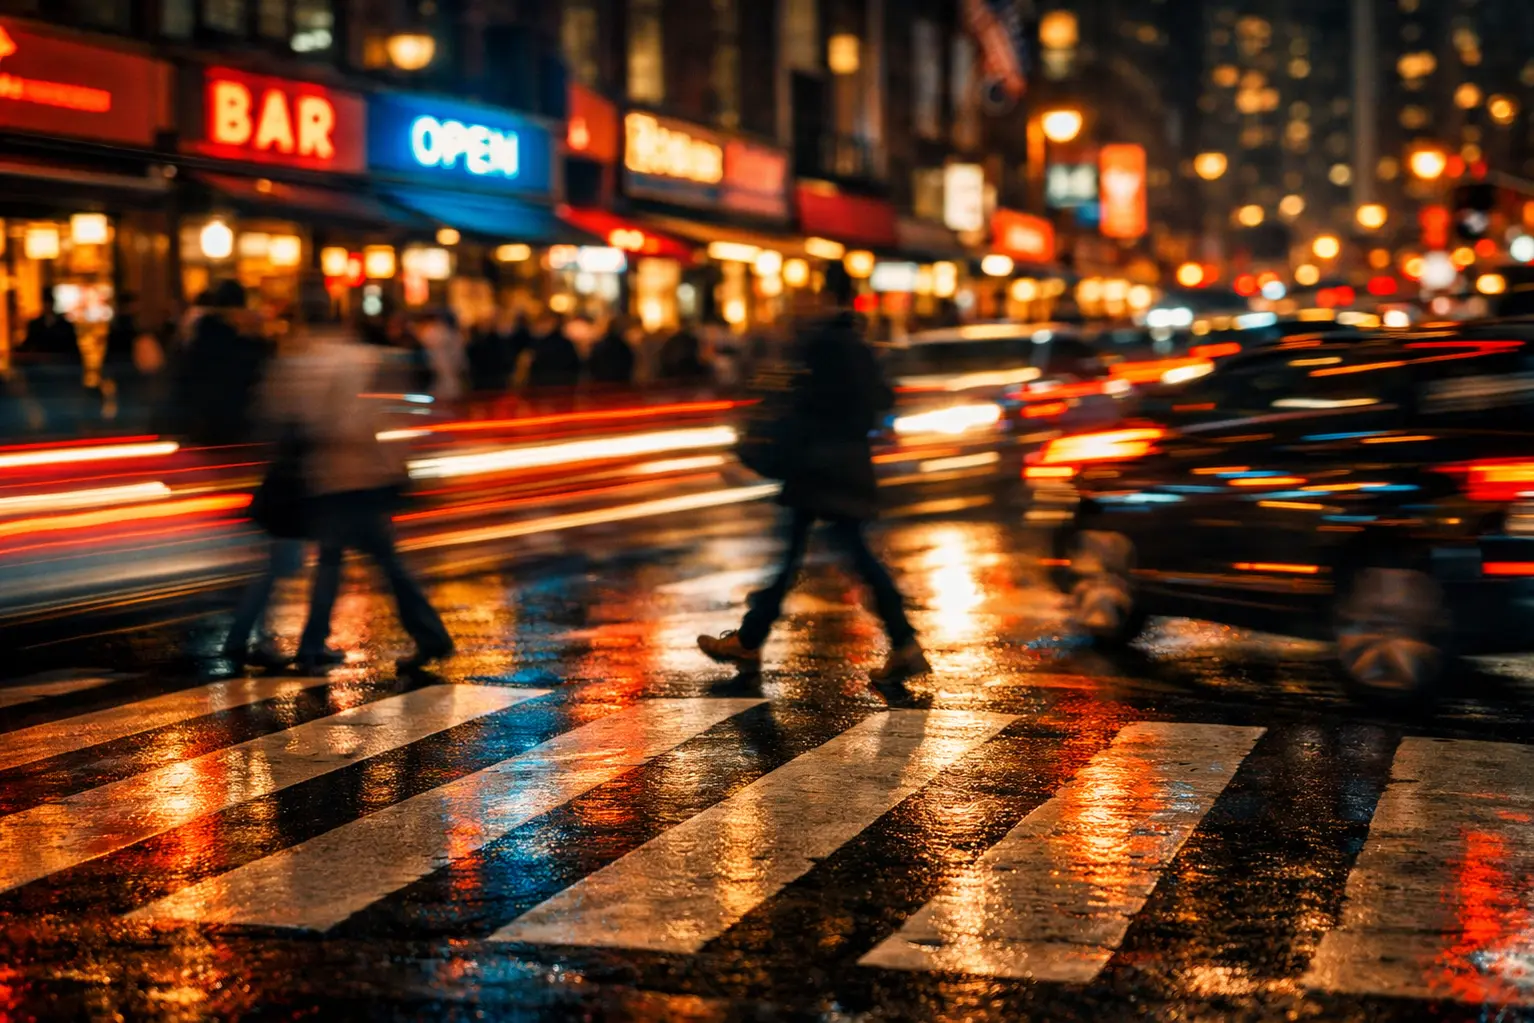
Scene Breakdown #1: Busy Street at Night
Let’s step into a real situation.
You’re standing on a busy street at night. Cars are passing, headlights streak through the frame, people cross the road, neon signs flicker above storefronts.
This is one of the most dynamic and chaotic scenes you can shoot.
If I were shooting this, here’s what I’d immediately analyze:
Where is the dominant light coming from?
Usually headlights or street lamps.
What’s moving?
Cars, people, reflections.
What do I want to preserve?
Sharpness or motion?
Now comes the decision.
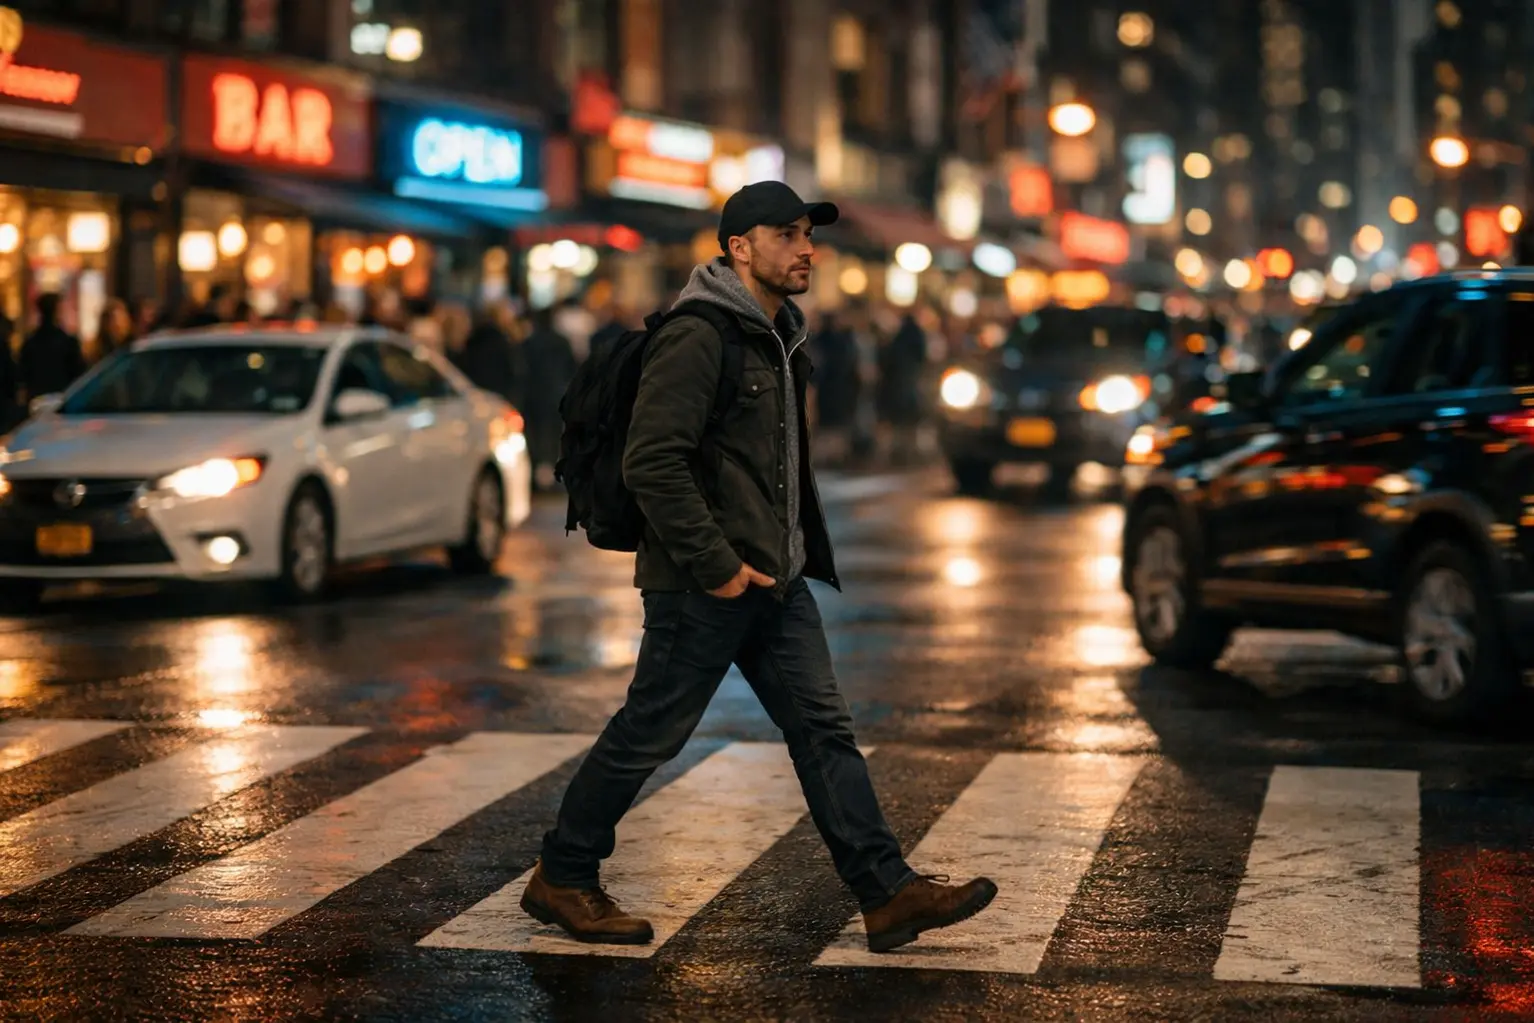
Option 1: Freeze the moment
If I want sharp people and crisp detail, I’ll increase shutter speed. That means I’ll need to compensate with ISO or aperture.
The risk?
Noise increases. Highlights can blow out.
Option 2: Embrace motion
If I slow the shutter, cars turn into light trails. People blur slightly. The scene becomes more cinematic.
This is where night photography starts to feel intentional.
Instead of fighting movement, you use it.
And this is the shift most beginners never make.
They try to “correct” motion instead of designing it.
Now let’s talk focus.
Autofocus struggles here because of low light and moving subjects. I would either:
Use continuous autofocus (AF-C) with tracking
Or pre-focus on a specific point and wait for subjects to enter the frame
This second method is incredibly powerful.
You stop reacting — and start anticipating.
Scene Breakdown #2: Quiet City Skyline
Now let’s switch completely.
You’re looking at a quiet skyline — buildings lit from within, reflections on water, maybe a bridge in the distance.
No chaos. No urgency. Just stillness.
This scene demands a different mindset.
If I were shooting this, the first decision is simple:
Tripod or handheld?
And honestly?
Tripod wins almost every time here.
Why?
Because nothing is moving fast — which means you can afford longer exposures.
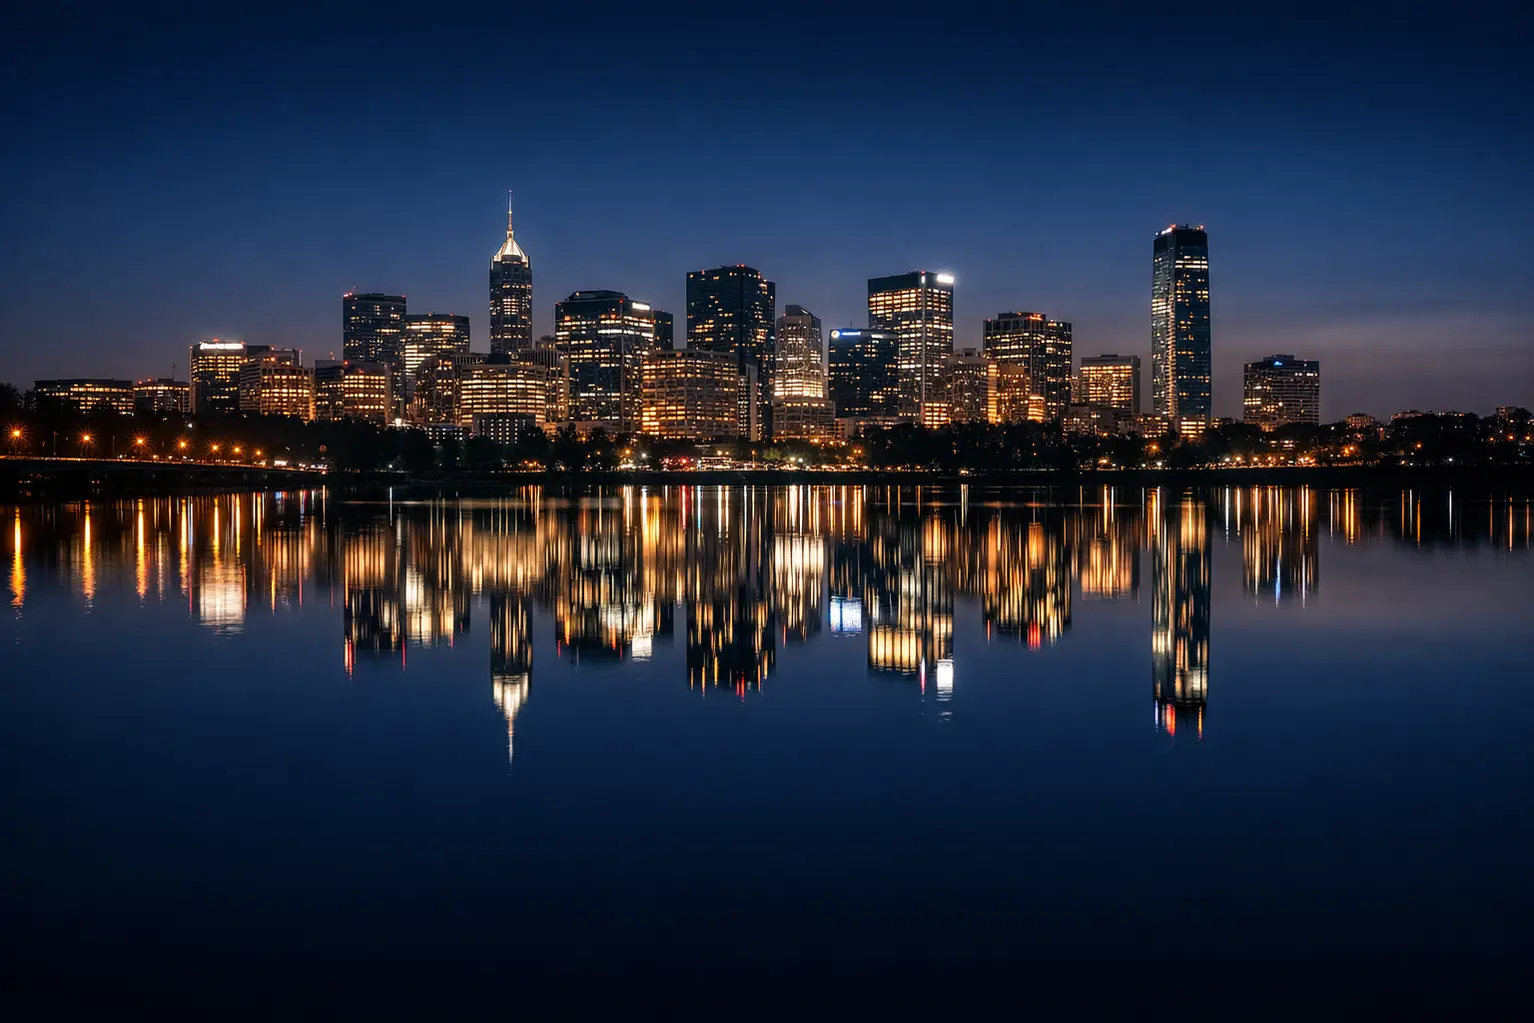
And longer exposure means:
Lower ISO → less noise
More detail → cleaner image
Smoother water → more aesthetic result
This is where night photography becomes clean instead of chaotic.
You’re not fighting light anymore — you’re collecting it.
Now think about composition.
In busy scenes, composition reacts to movement.
In quiet scenes, composition becomes deliberate.
You notice symmetry. Reflections. Leading lines from roads or bridges.
Everything slows down — including your decisions.
Focus is easier here, but still important.
I would:
Use single-point autofocus
Focus on a high-contrast building edge
Or switch to manual focus for precision
And here’s the key difference between this and the street scene:
There is no urgency.
You can take your time. Refine your shot. Adjust settings carefully.
This is where beginners often rush — and lose quality.
Genre Decision Table (Scene vs Settings vs Result)
This is where night photography becomes practical. Instead of guessing settings every time, you start recognizing patterns. Different scenes demand different decisions — and once you see those patterns, your results become consistent.
Think of this as your mental shortcut.
You don’t need perfect numbers. You need the right direction.
| Scene | Key Decision | Settings Direction | Result |
|---|---|---|---|
| Busy street with traffic | Freeze vs motion blur | Fast shutter for sharp / Slow shutter for trails | Sharp action or cinematic light streaks |
| Street portrait under neon | Focus accuracy + color mood | Wide aperture + controlled ISO | Sharp subject with rich color atmosphere |
| City skyline (tripod) | Noise vs exposure time | Low ISO + long exposure | Clean, detailed image with smooth tones |
| Handheld night street | Stability vs noise | Higher ISO + faster shutter | Slight grain but usable sharpness |
| Rainy street reflections | Highlight control | Underexpose slightly | Rich reflections without blown highlights |
Notice something important:
You’re not chasing “correct settings.”
You’re choosing trade-offs.
Every night photo is a balance between:
Noise vs sharpness
Motion vs clarity
Color accuracy vs mood
This is why copying settings from another photographer rarely works.
The scene is always different.
The light is always different.
And your intention should be different too.
How Light Actually Behaves at Night
At night, light stops being predictable — and starts becoming character. During the day, color is neutral and consistent. At night, every light source brings its own personality into the frame.
And this is where most photographers lose control.
They try to “correct” everything to neutral white.
But night photography isn’t about neutral color.
It’s about understanding — and sometimes embracing — color shifts.
Let’s break down the three main light sources you’ll encounter in cities.
Tungsten Lighting (Street Lamps)
Tungsten light is warm — often very warm. It produces that classic orange/yellow glow you see under street lamps.
This warmth can feel cinematic and nostalgic, especially in portraits or quiet street scenes.
But it can also overwhelm your image if not controlled.
If you correct it completely (using white balance), you lose the atmosphere.
If you leave it untouched, skin tones can become too orange.
The goal is balance — not elimination.
Personally, I often keep some of that warmth because it tells the story of the scene.
LED Lighting (Modern City Light)
LED lights are cooler and more neutral — but also more inconsistent.
You’ll see them in street signs, billboards, storefronts, and public lighting.
The challenge?
Different LEDs have different color temperatures.
Some are blue, some are greenish, some are almost white.
This creates mixed lighting within the same frame.
And your camera struggles to balance that automatically.
This is why night shots often look “off” even when exposure is correct.
The solution is not perfect correction — it’s controlled acceptance.
Let some colors stay. Adjust others in post.
Neon & Artificial Colored Light
This is where night photography becomes expressive.
Neon lights introduce strong, saturated colors — red, blue, purple, green.
These are not errors. These are opportunities.
Neon can define your entire composition.
It can create contrast, depth, and mood that simply doesn’t exist during the day.
But it also introduces a challenge:
Color dominance.
If one color is too strong, it can overpower everything else in the frame.
This is where positioning matters.
Move slightly, change your angle, or reframe — and the balance of color changes completely.
Here’s the key takeaway:
You are not photographing objects.
You are photographing light sources.
And once you start thinking that way, your night photography transforms.
Gear That Actually Matters at Night
Let’s clear this up: you don’t need expensive gear to shoot at night — but the right gear makes your decisions easier. Night photography amplifies limitations. What works fine during the day starts to struggle after sunset.
So instead of thinking “best gear,” think “what removes friction in low light?”
Tripod
If your scene is static, a tripod is the single biggest upgrade you can make.
Why? Because it removes the need to fight shutter speed.
Once your camera is stable, you can:
Use low ISO → cleaner images
Use long exposure → more light, more detail
Avoid motion blur caused by hand shake
This is the difference between noisy and clean night photos.
In skyline, architecture, or reflection shots, handheld shooting is simply a compromise.
A tripod removes that compromise completely.
If you’re looking at options, something like travel tripods on Amazon or carbon fiber tripod selections at B&H can dramatically improve your night results.
But here’s the key:
Use a tripod when the scene allows it — not as a default.
Fast Lens (Wide Aperture)
A fast lens doesn’t just create background blur — it gives your camera more light to work with.
At night, light is your biggest limitation. A lens with a wide aperture (like f/1.8 or f/1.4) allows significantly more light to hit the sensor.
That means:
Lower ISO → less noise
Faster shutter → less motion blur
Better autofocus performance
This is why fast primes are so popular for night photography.
Options like 35mm f/1.8 lenses or 50mm f/1.8 lenses at B&H strike a great balance between price and performance.
But there’s a trade-off:
Wide apertures create shallow depth of field.
Which means:
Your focus has to be precise.
At night, this becomes even more critical.
IBIS (In-Body Image Stabilization)
IBIS helps you shoot handheld in situations where it would normally be impossible.
It stabilizes small hand movements, allowing you to use slower shutter speeds without introducing blur.
For example:
Instead of 1/100 → you might shoot at 1/20 handheld
That’s a huge difference in low light.
Modern cameras found in mirrorless cameras with IBIS or IBIS-enabled cameras at B&H are incredibly capable.
But IBIS is not magic.
It stabilizes you — not your subject.
If people or cars are moving, they will still blur.
So IBIS solves one problem — not all of them.
Real Workflow: How I Shoot Night Scenes
This is what I actually do when I’m out shooting at night — no theory, just decisions in real time. The goal is simple: understand the scene first, then adjust settings once, and stay consistent.
Let’s walk through it.
Step 1: Stop and observe
I don’t touch the camera immediately.
I look at the scene:
Where is the light coming from?
What’s moving?
What feels interesting?
This takes 5–10 seconds — but changes everything.
Step 2: Decide the priority
I ask one question:
Do I want sharpness, motion, or atmosphere?
I don’t try to maximize everything.
I choose one.
Step 3: Set the foundation
If static scene → tripod → low ISO
If moving scene → handheld → faster shutter
If creative → adjust for motion blur
This is where most people overcomplicate things.
I keep it simple.
Step 4: Focus deliberately
I don’t trust wide-area autofocus.
I either:
Use single-point AF on a high-contrast subject
Or pre-focus and wait for the scene to align
This removes randomness completely.
Step 5: Take one test shot
Then I zoom in.
Check sharpness. Check highlights. Check noise.
And I adjust once.
Step 6: Shoot consistently
Once it works, I stop changing settings.
I focus on composition, timing, and variation.
This is where the real photos happen.
And here’s the part nobody talks about:
Most missed shots happen because of hesitation.
You change settings too often. You second-guess decisions. You chase perfection instead of capturing moments.
I don’t do that.
I decide fast — and then I trust that decision.
When to Break the Rules at Night
Here’s something most tutorials won’t tell you: the “rules” of night photography are only useful until they start limiting your creativity. Once you understand control, you can start bending — even breaking — those rules intentionally.
Because at night, imperfections often create the strongest images.
Blur (Use Motion, Don’t Fear It)
We spend so much time trying to avoid blur — but at night, blur can become your signature.
Instead of freezing everything, you can slow your shutter and let motion paint across the frame.
Cars turn into light trails.
People become ghost-like figures.
City movement becomes atmosphere.
This isn’t a mistake. It’s a design choice.
The key is control.
Intentional blur has direction and purpose.
Random blur feels like failure. Controlled blur feels cinematic.
Grain (Noise as Mood)
Most photographers are obsessed with eliminating noise.
And yes — clean images look great.
But here’s the shift:
Noise is not always a problem.
At night, a bit of grain can add texture, grit, and realism — especially in street photography.
It can make your image feel raw and alive instead of overly processed.
The difference is intention.
Uncontrolled noise looks distracting.
Controlled grain looks like style.
If you’re pushing ISO using cameras like those found in full-frame mirrorless camera options or low-light cameras at B&H, you’ll notice how modern sensors handle noise much more gracefully.
So instead of always fighting noise, ask:
Does it hurt the image — or does it add to it?
Overexposed Highlights (Let the Lights Glow)
During the day, blown highlights are a mistake.
At night?
They can be part of the mood.
Street lights, neon signs, reflections — they often look better when they glow slightly instead of being perfectly controlled.
If you try to preserve every highlight detail, your image can end up too dark and lifeless.
Sometimes, letting lights clip just a bit creates a more natural and cinematic feel.
The trick is balance.
Let highlights glow — but don’t let them dominate the entire frame.
Conclusion
City night photography is not about fighting darkness — it’s about understanding light in its most complex form.
Once you stop chasing perfect settings and start reading the scene, everything becomes clearer. You begin to see patterns in movement, light sources, and contrast. And more importantly, you start making decisions instead of reacting.
This is the turning point.
Instead of asking “what settings should I use,” you start asking:
What do I want this scene to feel like?
That single shift changes your results completely.
Because at night, technical perfection is not the goal — intentional choices are.
Now tell me: do you usually try to fix night scenes — or actually interpret them?
FAQ
What are the best settings for night photography?
There is no single “best” setting. It depends on the scene. Generally, use a wider aperture, adjust ISO based on light, and choose shutter speed depending on whether you want to freeze or blur motion.
Why are my night photos blurry?
Usually because of slow shutter speed or camera shake. Use a tripod for static scenes or increase shutter speed when shooting handheld.
How do I reduce noise in night photography?
Lower ISO when possible, use a tripod for longer exposures, and avoid underexposing your images.
Is a tripod necessary for night photography?
Not always. It’s essential for static scenes like skylines, but for street photography you can shoot handheld with the right settings.
Can I use autofocus at night?
Yes, but it may struggle in low light. Use single-point focus on high-contrast areas or switch to manual focus when needed.
Why do my night photos have strange colors?
Because of mixed lighting sources like tungsten, LED, and neon. Instead of fully correcting them, try to use those colors creatively.